Saturday, June 25, 2016
Monday, September 29, 2014
Sunday, September 28, 2014
Homefront Team Fall Giveaway
The Homefront Team is SUPER excited to announce a fun Fall Giveaway as a way to WELCOME in the holiday shopping season!
8 AWESOME PRIZES
8 LUCKY WINNERS
Yes, you read that right: 8 winners! We were so excited, that we thought that it would be great way for us to say THANKS to all of our Homefront Team supporters by offering 8 different prizes. And these prizes are actual CREDITS to the shops, so the winner gets to CHOOSE what special handmade creation they would like from our fabulous sponsors!
The shops participating in this giveaway and their Prize Credits are:
$10 Credit for Shae Bugs Styling Bows
 |
| Shae Bugs Styling Bows |
$10 Credit for Quite Crafty
 |
| Quite Crafty |
$15 Credit for Camelot's Accessories
 |
| Camelot's Accessories |
$15 Credit for Mallory Alisabeth
 |
| Mallory Alisabeth |
$20 Credit for Camelot's Treasures
 |
| Camelot's Treasures |
$15 Credit for The Taffy Box
 |
| The Taffy Box |
$10 Credit for R. Inspirations
 |
| R. Inspirations |
$10 Credit for Shop Wool Mama
 |
| Shop Wool Mama |
Here's the details on how YOU can enter and win.
This contest will be open from October 2nd until October 9th.
All entries will be on the rafflecopter form below.
You must LIKE all of the Facebook pages in order to be completely entered.
All winners will be randomly selected on October 10th, and randomly paired with one of the 8 shops listed above.
You can NOT own a shop that is sponsoring a prize in this giveaway or is a member of the Etsy Homefront Team.
This giveaway is in no way sponsored or affiliated with Facebook.
a Rafflecopter giveaway
Monday, September 22, 2014
Wednesday, September 17, 2014
Homefront Team Blog Hop
Homefront Team has wrangled up some of it's members to participate in a Blog Hop. Every month, we will be giving our team mates a specific topic to discuss on their blog, and then link up to the fellow team mate's blogs who have done the same! Be sure to follow a long, to find out some interesting information from some fabulous shops.
This month we asked our members to share their fall time activity or memory.
Members that are joining us this month are:
 |
| Camelot's Treasures |
 |
| R2Rdesigns |
 |
| Semi Sweet Charm |
 |
| Simply Leilani |
Check out their blog posts about their favorite fall time activity or memory on September 17th, 2014.
And on your next shopping visit to Etsy, be sure to search "homefrontetsy" for some fabulous handmade items from some fabulous Homefront Team members!
Thursday, September 4, 2014
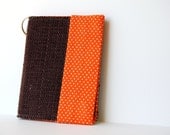
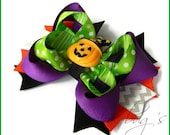
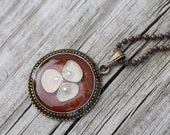
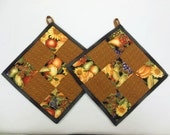
FALL in love with Homefront - Etsy Treasury
Fabulous Fall Finds from the Homefront Team

$22.50
| 
$10.00
| 
$4.00
| 
$4.00
|

$16.99
| 
$6.00
| 
$25.00
| 
$75.00
|

$22.00
| 
$14.00
| 
$5.00
| 
$34.00
|

$8.50
| 
$59.95
| 
$20.00
| 
$10.00
|
Powered By Toastie Studio - Etsy Tools
Wednesday, December 4, 2013
Christmas on the Homefront - DIY Holiday Wreath
Homefront Team Member Camelot's Treasures is sharing a special DIY tutorial on making a special Holiday Wreath for your family! Be sure to check out her lovely handmade doll clothes at her shop on your next visit to Etsy.
After so many moves the past few years, our family Christmas wreath wasn't able to stand up to all the packing and unpacking. So this year, the kids and I decided we were going to try our hand at making our own wreath. After several hours scouring over inspirational ideas on Pinterest and getting overwhelmed with all the different ways, we decided the best way to go about it was to just jump in and get our hands dirty. Maybe we can even inspire you a little for your very own wreath - and we only spent about $5!
 |
| DIY Holiday Wreath Tutorial from Camelot's Treasures |
 |
| Our choices abounded! |
The day before I pulled out the decorations, I purchased a Styrofoam wreath from Walmart that cost us about $5. It's the 12 or 14 inch one. (That was the only thing I actually payed for for this entire project.)
After we went through all of our stuff, we came up with several feet of green garland and several little decorations.
We hot glued the end of the garland to one spot and just started wrapping until we felt that our wreath was at a satisfactory plushness. This is definitely an opinion - you can do more or less, just make sure you cover all of the wreath so you can't see the white (or whatever color your wreath is). I think we used about 3 yards of garland.
 |
| He's having fun wrapping the wreath, can't you tell? |
 |
| Here's the fullness we achieved on our wreath. |
Next, we did a dry run on the placement of our chosen decorations. Be sure that you get it to look the way you want before you attach them with hot glue or twist ties. We used a glue gun, partly because I <3 my glue gun, partly because my 6 year old thinks it's the coolest craft tool I own, but mostly because it was readily available.
 |
| We "debated" strategic placement of all the decorations. |
After about an hour and a half of creating, we had made our self this pretty wreath. We were pretty satisfied! I even added a little dangle that hung in the middle of the wreath, using 3 ornaments and a little string knotted around the top of the wreath. The "hanger" is just a pretty ribbon we found at the Dollar Tree, tied around the top of the wreath, and tied in a bow at the top.
 |
| Viola! A Wreath Creation! |
Here are some easy tips on how to plan your OWN Holiday Wreath:
1. Get wreath form (you can get these at any craft or hobby department or store)
2. Check out your stash of decorations - you never know what you can use up!
3. Use natural accents - pine cones, twigs, acorns, etc are all around you; take advantage of these cheap decorations!
4. Enlist your whole family to help make your creation.
5. Set aside a couple of hours to plan and create your project.
6. Have fun - this wreath may only cost a few bucks, but it will be a priceless addition to your holiday decorations!
 |
| A close-up of our wreath on our front door Be sure to keep checking back to this blog all month long for other great recipes and holiday tutorials from our Homefront Team members! And remember to search "homefrontetsy" on Etsy to see all the great handmade items offered by our shops. |
Subscribe to:
Comments (Atom)


